Latest News
June 1, 2009
By DE Editors
 |
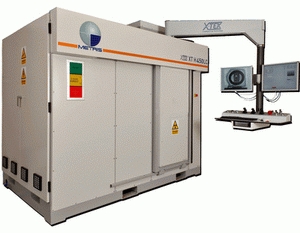
Metris introduces a high-power 450kV micro-focus X-ray/CT system for full insight inspection of turbine blades, castings, and other dense objects. Its 450kV micro-focus source, combined with the newly developed Curved Linear Array (CLA) detector maximizes the detection of X-ray flux resulting in 25-micron accuracy and repeatability, according to the company.
When X-rays hit an object, they are absorbed but also scattered, an undesired phenomena that aggravates with the density of the part. Scatter coming from all points of the part reduces image contrast sensitivity. The newly developed CLA detector optimizes the collection of the X-rays that travel through the part without capturing the scattered X-rays, according to Metris. The linear array of diodes is curved to further enhance image quality by keeping the X-ray path length to diode receptors constant compared to straight arrays. This allows longer crystals to be used to enhance the X-ray sensitivity and hence boost the signal-to-noise ratio.
In order to reduce the through-life cost of the X-ray source, Metris uses open-tube source technology in its CT systems. With this open-tube technology, the replacement of the X-ray filament is straightforward and the cost of the filaments used compared to the costly exchange of an entire closed source tube every few years is low.
With a maximum specimen diameter of 600mm and 500mm length, XT H 450 LC X-ray/CT system deals with small blades at high magnification, and also large blades and large castings. In a production environment, the system runs automatic data acquisition and inspection based on blade type, generating pass/fail status for each inspected part. When taking radiographs of turbine blades, raw images and specific information items, such as blade profiles and inner and outer wall thicknesses, are stored in the database for traceability and further analysis.
The analysis software, Focus Inspection, supports feature and full part-to-CAD inspection and visualizes inspection results in interactive graphics and reports. Engineers
For more information, visit Metris.
Sources: Press materials received from the company and additional information gleaned from the company’s website.
Subscribe to our FREE magazine, FREE email newsletters or both!
Latest News
About the Author
DE’s editors contribute news and new product announcements to Digital Engineering.
Press releases may be sent to them via [email protected].


