Latest News
July 1, 2016
Computed tomography (CT) scanning has traditionally been associated with medical applications. However, the technology has increasingly been adopted by industry as a non-destructive testing alternative, and for precise measurement/metrology applications. CT scanners are used for reverse engineering, quality control, ensuring internal contact points are made after assembly, to determine material porosity and to make CAD file comparisons.
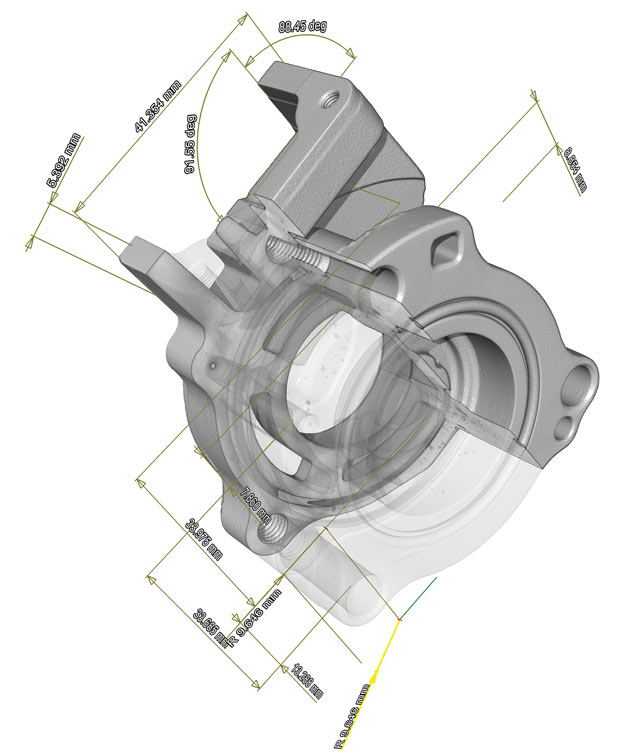
 First Article Inspection is one potential application for CT scanning. Image courtesy of Jesse Garant & Associates.
CT scanning is part of the rapidly growing market for 3D scanning, which Allied Market Research estimates will generate revenues of $5.7 billion by 2021 and experience a CAGR of 13.6% over the next five years.
CT scanning allows companies to capture precise dimensions of both internal and external structures in a completely non-destructive manner. Using multiple X-ray images, CT scanning solutions generate voxel (volumetric pixel) data sets to create images. Parts are rotated in the scanner and imaged hundreds of times. The 2D images are combined into a 3D point cloud.
In emerging additive manufacturing markets, CT scanning is the only way to confirm the quality of internal structures without breaking a completed part.
“With highly complex plastic parts you can do analysis and inspection of a higher quality than you could ever dream of using conventional methods,” says Giles Gaskell, applications manager at Wenzel America. “There’s no limit to what you can see and how small a feature you can measure. Conventional measurement isn’t cutting it on complex parts. For injection molded or additively manufactured parts, CT is the answer.”
Wenzel (which is headquartered in Germany) added CT scanning to its metrology offerings via its acquisition of Volumetrik in 2008.
“CT scanning is really growing and growing for these applications,” says Steve Young, owner of Exact Metrology in Cincinnati, whose company previously offered a wide variety of external scanning and metrology solutions. “We really look at this as the next logical step.”
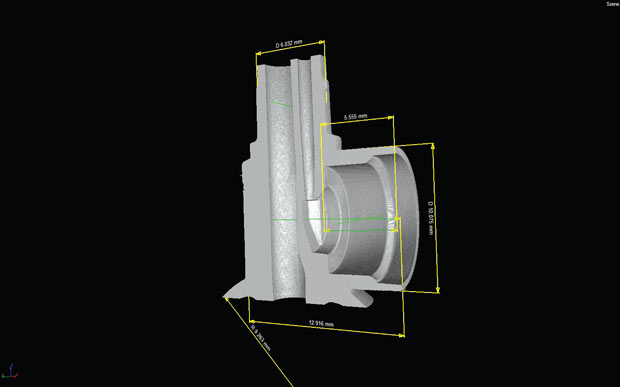
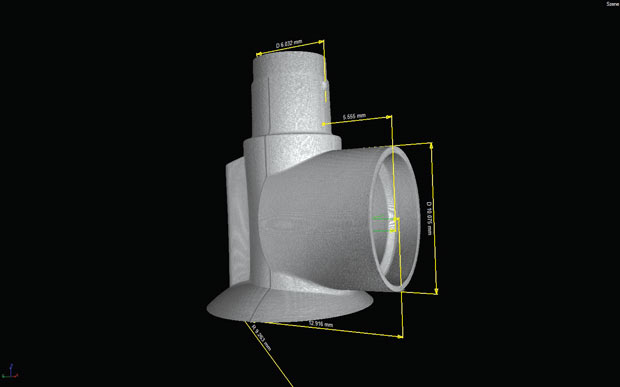
 CT scanning lets engineers obtain measurements of internal and external structures without having to disassemble a part. Images above courtesy of Exact Metrology. Image on opposite page courtesy of Jesse Garant & Associates.
Exact Metrology now has two CT scanners operational (in two different facilities), and plans to add a second machine to its Cincinnati location. According to Young, they will likely invest in equipment that will allow them to scan larger or denser parts. “Each of the different scanner is trying to do something unique, so I could ultimately see us having several scanners for different applications,” he says.
Unprecedented Visibility
CT scanning can provide incredible internal details for a variety of parts and materials. “We’ve scanned small plastic pieces that couldn’t be examined if they were broken apart, aerospace parts, and other critical parts,” Young says. “We scanned a part that was made of glass-reinforced plastic, and the customer needed to understand how the glass fibers were aligning once the part was molded. We were able to show them that so they could fix a flaw in their process.”
For measurement and quality control, CT can provide highly accurate data on a variety of parameters, and for a wide array of materials. “I can scan a whole, unopened box of liquid gel caps, for instance,” Young says. “I can tell you the volume of the liquid in each pill, the wall thickness of the gel pill without opening the box.”
That’s particularly important in industries like medical device manufacturing, aerospace and automotive where regulatory requirements call for very high standards of quality. “There’s a lot of pressure to be able to prove out the quality of designs,” Gaskell says. “This is also increasingly an issue because people are turning to advanced methods of manufacturing such as additive manufacturing and 3D printing.”
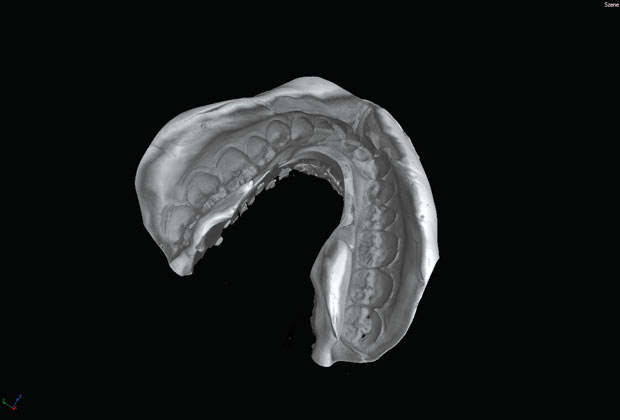
 The technology is used in a host of dental and medical spaces because the FDA requires exact measurements for complex designs. Image courtesy of Exact Metrology.
The key advantage to CT scanning is that it provides an alternative for inspections that otherwise required destruction of the part. “With traditional methods, even if we cut a part into pieces and scanned the parts, we still couldn’t see porosity or other features,” Young says.
Additive manufacturing techniques are also driving demand for CT scanning services. One of the key advantages of 3D printing is that you can create and manufacture parts that couldn’t be made any other way. Because of that, they also can’t be inspected or measured using traditional means. At this year’s RAPID conference, Gaskell presented a session titled “If You Can’t Measure it, You Can’t Sell It,” that tackled that very problem.
“If you think you are going to make medical devices or aircraft parts and actually get them approved, that’s not going to happen if you can’t measure them,” Gaskell says. “The only way to do that is with a CT machine.”
CT also has an advantage in measuring other types of difficult items. Gaskell points out that, in addition to the heavy industries his company services, another common item that needs scanned are bottle caps. “Bottle caps and bottles are extremely difficult to measure,” Gaskell says. “Bottle caps are hard because the most important feature is the back of the thread. CT scanners are perfect for that.”
Complex, Expensive Equipment
While CT scanning is proving its value, many companies would be hard pressed to justify purchasing their own equipment. Industrial CT scanners can cost anywhere from $200,000 to $500,000 (although there are a few less expensive models), and calibrating them for scanning different types of materials takes significant expertise.
Generally, the denser the material, the larger the power source you’ll need to shoot through the part. Focal spot sizes can also be adjusted. “With a smaller spot size, you get more precision,” says Jesse Garant, president at Jesse Garant & Associates Metrology Center, which provides 3D part inspection services. “With a lager spot size, you get a faster scan.”
 Users should evaluate CT scanning for part inspection on a case-by-case basis, as some machines may not be suitable. Image courtesy of Jesse Garant & Associates.
In some cases, multiple small parts can be scanned simultaneously in one CT unit, which can improve speed and cost.
“It’s a complex technology,” Garant says. Garant’s lab works with Tier 1 parts suppliers in the automotive and aerospace industries. “The service providers and manufacturers are trying to simplify it for the end user,” he says.
Wenzel, for example, sells CT machines and offers scanning services. Many of the company’s service bureau customers are clients who need measurement or reverse engineering services, but that can’t rationalize purchasing the equipment themselves.
That’s why it has been difficult for manufacturers to invest in their own CT equipment and they typically turn to service providers. A machine can be configured to scan particular parts at a particular density, but if you try to scan something else with the same machine you’ll need an experienced operator who can adjust the settings. “Many manufacturers are acquiring CT systems, and then realizing that while it worked for one application, it’s not the right tool for 75% of their other parts,” Garant says.
Before considering buying a scanner, make sure it will work for multiple parts and that you can keep the machine busy enough to justify the expense. There are also different types of X-ray detectors and scanner types that offer trade-offs in speed and image quality. “Do your homework,” Garant says. “If buying a machine is not the right fit, a service provider may be more feasible.”
CT Scan Limitations
While CT scanning provides visual information that is unobtainable via other methods, there are instances where it does not work. For example, there are sheet metal applications that aren’t well suited for CT scanning. “You may need a specific type of machine for that, or you can look inside a section for a specific weld, but it’s very much on a case-by-case basis,” Garant says.
Very large and very dense pieces (an iron casting several feet across, for example) also won’t work. “We don’t want to try to shoot through those parts because it requires too much energy,” Garant says.
Most industrial scanners max out at parts that are a few feet across. And unlike metrology scanners, CT systems are not mobile—they can weigh as much as 20,000 lbs. “Scanning large items is not a mainstream capability,” Gaskell says. “The part has to fit in the box; it’s not like a hospital CT scanner where you can measure a patient however big they are.”
Small 3D-printed parts made of tungsten carbide, silver, gold or other materials are also difficult to scan. “They are small, but if you are trying to image out the internal pores, we need so much energy to shoot through them that it can be difficult to get a good image,” Garant says.
Highly detailed aircraft parts made out of cobalt chrome or Inconel are also challenging. “No CT scanner can measure more than around three inches of Inconel to a metrology standard,” Gaskell says. “You can see through it, but you can’t get accurate measurements. You’d have to combine methods. So you could use a CT scanner to confirm features are in the part, but you’d have to sample the parts and cut them up to measure it.”
Another weakness is scanning parts made of multiple materials. “We had a water pump housing that was made of plastic and brass,” Young says. “We had to put enough power through to scan through the brass, but the image quality on the plastic was heavily artifacted. It looked like a sandstorm, but the brass came out perfectly. The data for the plastic was too noisy to use.”
Software Advancements Drive Improvements
Over the next several years, CT scanners are expected to get faster while prices drop. That will be enabled, in part, by faster data processing.
“We are able to pass that savings on to the client,” Garant says. “A scan isn’t tying up a $100,000 computer for five hours; now it’s down to 15 minutes.”
Scanner manufacturers are improving equipment performance to reduce scattering and image artifacting, and calibrating the equipment for measurement and inspection applications.
Software advancements are also going to be critical for overcoming some of the physics challenges CT scanning faces when it comes to very dense materials. “There are power limitations on what you can do, but we need to maximize what we can do within those limits using the software,” Gaskell says.
Service providers and vendors, meanwhile, are trying to spread the word about the potential of CT for these industrial applications. “We’re really trying to get in front of people and educate them,” Young says. “Some customers know about CT scanning and some don’t. Typically they call up with a problem and ask if there is a way to see inside a part. They don’t necessarily know how we’re going to do it.”
“There’s still a massive learning curve for this industry. We’ve been using CMM for 40 years, and people are still learning what that technology can do,” Garant says. “As people become more comfortable and experiment with CT scanning, we’ll see the market continue to grow.”
That growth should accelerate as equipment prices come down. Wenzel offers at least one machine that sells for a little over $100,000, which is roughly a tenth of what the cost was several years ago.
Gaskell sees a huge opportunity in the additive manufacturing space, where he says many companies have yet to realize the measurement challenges they’ll face as they attempt to get regulatory approval for parts that are destined for aircraft and other applications. “I know of instances where companies have spent millions of dollars on 3D printing, and the most accurate measuring tool they have is a set of calipers,” Gaskell says. “That’s where we are right now. I see massive potential market for CT. We’re at a tipping point.”
More Info
Subscribe to our FREE magazine, FREE email newsletters or both!
Latest News
About the Author
Brian Albright is the editorial director of Digital Engineering. Contact him at [email protected].
Follow DE


