Latest News
August 1, 2011
By Kenneth Wong
 Autodesk Inventor 2012 marks the debut of Eco Materials Adviser, a sustainable design solution nested in CAD. |
There’s no question you’re getting more bang (or byte) for your buck with Autodesk’s suite deals, part of the company’s 2012 releases. Take, for instance, the Product Design Suite 2012. The Ultimate Edition I’m examining for this article includes Autodesk Inventor Professional, Autodesk Alias Design, Autodesk 3ds Max Design, AutoCAD Mechanical, Autodesk Showcase, Autodesk SketchBook Designer, Autodesk Vault, and Autodesk Mudbox—a lineup that, according to manufacturer suggested retail prices, would cost you more than $21,000 if purchased separately. Bundle pricing is $9,995, a deep discount of more than 50%.
The Product Design Suite is an indication of Autodesk’s belief in—and commitment to—digital prototyping. The company envisions engineers and designers using a combination of conceptual sketching, 3D modeling, surfacing, rendering, and visualization tools to bring ideas to reality, with most of the creative process taking place in a digital environment.
For the Product Design Suite, the workflow may look like this: You use SketchBook Designer to sketch out your ideas. You use Autodesk Inventor and AutoCAD Mechanical to translate your ideas into 3D prototypes and production drawings. If your design involves complex surfaces, you may use Alias Design to draw them. If your design requires organic shapes and features that cannot be easily produced in mechanical CAD programs, you may turn to Autodesk Mudbox to digitally sculpt them. To turn your design into eye-catching presentations, you may use 3ds Max and Showcase to render them into photorealistic images and animations. Throughout the process, if you need data management at a workgroup level, you may rely on Autodesk Vault.
The Cocktail Napkin
Autodesk SketchBook Designer is a professional-level 2D sketching package with a simple, straightforward interface (something of a rarity in professional software). In SketchBook Designer, you work with Spline curves. True, you can also create similar curves—even similar sketches—in other vector drawing programs from graphics software makers (like Adobe Illustrator, ACDSee’s Canvas, or Corel’s CorelDRAW). However, in my experience, SketchBook Designer’s method of drawing, reshaping, and refining Splines using control points is incredibly effective. The curves produced in SketchBook Designer are extremely responsive and malleable. In many drawing programs, editing a curve at several points could lead to awkward segments and broken curvature continuity. In SketchBook Designer, I found that the software is able to resolve related tangents with grace and style to preserve the smooth flow.
Another imaginative feature in SketchBook Designer is the Symmetry command. With this command activated, whatever you draw on one side of the digital canvass is reproduced on the opposite side in reverse. The feature will be useful for sketching out designs with symmetrical geometry.
The Core of the Suite
In Autodesk Inventor, the core of the Product Design Suite 2012, you’ll find a few subtle but effective interface improvements. In editing standard features (such as blends and holes), you’ll find that the mini toolbar—a stack of floating menus that let you specify the desired parameter, select the desired element, select the desired tangent or trim treatment, and accept or reject the preview—makes it easy to execute an entire chain of actions with reduced mouse clicks.
You can also activate the marking menu, as Autodesk calls it, by right clicking in any empty space outside the model. This presents you with a series of options in a circular layout, which provides you with an easier way to cycle through applicable choices and select the one you need.
In adding fillets, you now have the option to add G2 continuity fillets, which gives you smoother transition and curvature so there’s no detectable seams between faces. In visual style (View > Appearance > Visual Style), you can turn on ray tracing by selecting the Realistic mode, along with ground plane reflections and shadows. This, however, will demand a significant amount of computing power, so if you have a slower system with limited memory, you may want to use this function judiciously.
Fusion Freedom
Inventor Fusion, once an Autodesk Labs product experiment, has been graduated as a regular feature of Inventor. Now, you can invoke Fusion’s direct-editing environment with a single menu button (called Fusion) on the main menu. (Note that installing Autodesk Inventor doesn’t automatically give you direct editing functions. To use this function, you must select Inventor Fusion during the installation process.) Fusion edits are performed in a separate program window, not inside Inventor’s classic parametric modeling window.
You might recall that, last year, Autodesk released an Inventor plug-in called Alias Design for Inventor, which let you perform freeform edits on your Inventor models. Now, many of the features found in Alias Design for Inventor have been incorporated into Inventor Fusion. For instance, while working in Fusion mode, you can use the Edit Edge command to reshape the geometry as a freeform object, pushing and pulling control points to create curvatures and surfaces not often available in a typical mechanical design program.
Fusion-edited parts can be imported back into Inventor’s parametric environment for further work with a single click, through a command called Return to Inventor in Fusion. When you do, you’ll notice that the edits you made in Fusion are now part of your model’s feature tree. If your edits cannot be translated into parametric steps (for instance, relocating a hole to a new position or deforming a face in freeform mode), you’ll see them listed as Alias Freeform features.
Eco Advice
The Autodesk-Granta Design partnership that began roughly six months ago is finally bearing fruits. The outcome is Eco Materials Adviser, a sustainable design feature now available inside Inventor (Environments > Begin > Eco Materials Adviser). Once you’ve identified the part you wish to analyze, you can verify the designated material and manufacturing process. Info sheets available on the materials give you greater insight into their impact on the environment. If there’s no manufacturing process specified, Eco Materials Adviser will offer a list of logical choices associated with the chosen material (for example, metal powder forming, forging, and vaporization for stainless steel).
Based on the geometry of your design, material choice, and manufacturing process, the application deduces manufacturing cost, water usage, energy usage, and CO2 footprint. Where applicable, you may also verify if the materials you’ve chosen are Restriction of Hazardous Substances (RoHS) compliant or not.
The results of your initial eco analysis will be used as baseline, the standard used to measure other scenarios. Once you’ve obtained your baseline, you may switch to an alternate material, alternate process, and then update the dashboard to see if the changes have made your design’s environmental impact higher or lower. (For instance, does the new material and process you’ve chosen reduce the amount of energy and water used?)
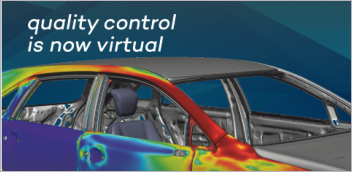
 Autodesk Showcase lets you create still images and short animations using your CAD files. |
You may continue to experiment with different design scenarios till you feel you have struck the right balance among cost, energy use, water use, and carbon footprint. If you’re at a loss on how to identify an alternate material, you may use Eco Materials Adviser’s search function to search for a new type by tensile strength, carbon footprint, unit cost, and a host of other factors.
Currently, Eco Materials Adviser only gives you a way to compare the impact of using different materials on the same geometry. So if you need to compare the outcome of two different geometric designs in Eco Materials Adviser (for example, the environmental impact of two versions of the same shelled part, with different wall thicknesses), you’ll have to run two separate analysis sessions, obtain reports for both, and compare them on your own.
Easier Motion Simulation
One of the greatest pains of simulating assembly motion is the need to manually specify and define the type of joins connecting adjacent faces and subassemblies. In Inventor 2012, you can place a checkmark next to the Automatically Convert Assembly Constraints to Joints to turn the degrees of freedom specified in your assembly into standard joints.
Conversely, if you’d like to define a specific type of joint, you can override the automation by unchecking this option. You’ll find this command under Environments > Begin >Dynamic Simulation > Manage > Simulation Settings.
On the Surface
The inclusion of Alias Design in the Product Design suite is an indication that in certain industries, such as consumer goods and automotive, complex surfaces have become more than optional aesthetic treatment. They’ve become a competitive advantage to make your product stand out.
Autodesk has probably noticed that some of its customers are turning to rivals’ products (most notably, Rhino) to create complex surfaces that cannot be easily designed in mechanical design software. By bundling Alias Design with Inventor, Autodesk is creating a combo that addresses both freeform modeling and precision modeling, giving its customers one less reason to defect.
However, bear in mind that Alias’ interface is dramatically different from a typical CAD modeling interface or a rendering program interface. Most likely, when working in Alias, you’ll create complex surfaces by stitching together splines or manipulate existing shapes by pushing and pulling the control vertices (CVs) around them. This method of modeling is quite different from the sketch-based extrusions and precision-modeling operations in parametric CAD. So if you’re brand new to Alias, be prepared to spend some time watching tutorial videos and performing the beginner’s exercises prescribed by the online Wiki.
Showing Off
For the more ambitious engineers and designers who’d like to create sophisticated animations and renderings, Autodesk 3dx Max is ideal. Rooted in the company’s media and entertainment division, 3dx Max gives you the same toolsets Oscar-winning animators, filmmakers, and digital artists have been using.
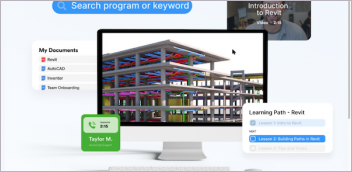
For those who prefer instead a low learning curve and quick-and-easy package to create brochure-worthy renderings, Showcase is a better alternative. When initiating a new scene, Showcase gives you the option to import files directly from Autodesk applications, including Inventor (mechanical design) and Revit (architecture). During import, you’ll get the option to immediately translate assembly constraints into animation-ready behaviors.
Showcase comes with preloaded materials and environments you can drag and drop into the scene to add flair to your CAD models. In the Present mode, you have the option to view two scenes side by side for comparison—a useful feature if you’re having trouble deciding between two different colors or finishes. Once your scene looks right, you may create a still image, a cinematic orbit, or a short movie sequence with start and end positions.
Licensing and Installation
Though it comprises a generous list of software titles, Autodesk Product Design Suite is still a single-seat license. If you’re thinking of, for instance, installing different titles on separate machines (say, Inventor on PC No. 1, 3ds Max on PC No. 2, and Alias on PC No. 3) and sharing them among three users, it won’t work. The install mechanism will restrict you to installing the content of the entire suite in a single machine. Compared to some of its rivals’ products, Autodesk Product Design Suite proves quite easy to install. The process is made easier in Release 2012 by the fact that, now, the installation files come on a small, portable USB drive—not a big stack of DVDs.
Autodesk has put in considerably effort to make titles in the suite interoperable and complementary. However, it’s difficult to imagine someone with expertise that spans across all the titles included in the suite. Most likely, you’re an expert in some of the titles, an intermediate user in others, and a beginner to a few.
You can become productive with easier titles in the bundle with little or no training (Autodesk SketchBook Designer, for instance), but certain professional titles (such as Autodesk 3ds Max Design and Autodesk Alias Design) may require considerable time and effort to master. Getting a lot more code for a little bit of extra cash is a good deal if you have a workflow that can fully take advantage of the suite’s comprehensive content.
Kenneth Wong writes about technology, its innovative use, and its implications. One of DE’s MCAD/PLM experts, he has written for numerous technology magazines and writes DE’s Virtual Desktop blog at deskeng.com/virtual_desktop. You can follow him on Twitter at KennethwongSF, or email him via [email protected].
For More Information:
Autodesk
Adobe
ACDSee
Corel
Granta Design
Rhino
Subscribe to our FREE magazine, FREE email newsletters or both!
Latest News
About the Author
Kenneth Wong is Digital Engineering’s resident blogger and senior editor. Email him at [email protected] or share your thoughts on this article at digitaleng.news/facebook.
Follow DE