GE Looks for a Line of Sight on 3D Builds with Digital Twins

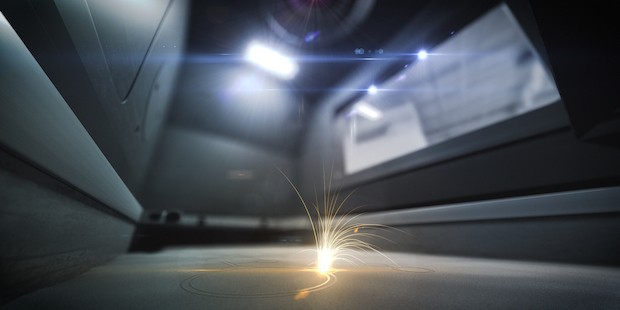
GE’s control system uses an inspection process that leverages high-resolution cameras, machine learning, and CT scanning to identify streaks, pits, divots, and other imperfections. Armed with this capability, operators will be able to take corrective action in a timely fashion, ultimately achieving 100% yield. Image courtesy of GE Global Research.
Latest News
December 18, 2017
3D printing has come a long way since it was introduced in the 1980s. It has firmly established itself as a valuable prototyping tool. Now the technology stands poised to transform manufacturing, finding particular relevance in the production of parts for industries like aviation and medical instrumentation. But 3D printing seems slow to take that next big step to advanced manufacturing, with many production facilities taking a wait-and-see attitude toward the technology.
One problem is that 3D printing simply takes too long to produce large or complex components. For example, some advanced 3D-printed aviation parts take more than a week to complete and require several additional hours for processing and validation. On top of that, if something goes wrong near the end of production, operators may have to scrap the part and start all over again, wasting valuable time and resources.
Performance Variability
Despite advances in additive manufacturing technology, even advanced powder-based printers experience variable performance, which can result in a less-than-satisfactory build. Poor performance stems from a variety of factors. These range from variability in the size of the powder particles to complex dynamics occurring when new powder layers are added. The reality is that every time the printer deposits a layer of powder, opportunities exist for imperfections.To avoid having to redo printing jobs and extend production schedules, operators must be able to spot imperfections in time to rectify them and determine when an imperfection must be corrected.
 GE’s control system uses an inspection process that leverages high-resolution cameras, machine learning, and CT scanning to identify streaks, pits, divots, and other imperfections. Armed with this capability, operators will be able to take corrective action in a timely fashion, ultimately achieving 100% yield. Image courtesy of GE Global Research.
Toward 100% Yield with Digital Twins
This is exactly what GE Global Research proposes to do with the new 3D printing control system it is working on. Ultimately, the researchers hope the system will enable 100% yield.The control system begins with an inspection process that uses high-resolution cameras to film every layer deposited by the printer, recording streaks, pits, divots, and other patterns in the powder — features nearly invisible to the human eye. In the next stage, the operators examine the samples with a CT scanner, searching for flaws that will compromise the quality of the part.
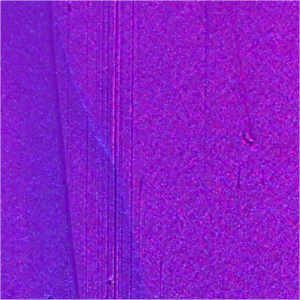
 This image offers a look at powder bed defects. In this case, the streaking and pitting are caused by powder particles dragged across the power bed by the coater. Although these features are nearly invisible to the human eye, imperfections such as these can compromise the quality of a build. Image courtesy of GE Global Research.
The system stores all of this data in computer memory, and machine-learning algorithms correlate defects revealed by the scanners with powder patterns recorded by the camera. As with other machine learning processes, the more inspection data used to train the system, the smarter it becomes.
“We believe computer vision and machine learning are key technologies in our overall goal of achieving 100% print yields,” says Joseph Vinciquerra, additive technology platform leader for GE Global Research. “We’re using computer vision to try and spot any anomalies that may occur during the printing process. Then, using artificial intelligence and machine learning, we’re building ‘digital twins’ of these anomalies.”
The digital twins are virtual models of the production process. These, in turn, can compare ideal profiles with the actual conditions in real time and recommend process changes to achieve a better result.
“Digital twins are living, learning models of industrial parts, assets, processes and systems,” says Vinciquerra. “In the case of a 3D printer, we’re building a twin of a build process and recording the slightest defects, deviations and other build characteristics. With our twins, they will continually be updated with each new build and become ever smarter in recognizing and troubleshooting any potential issues that might arise. These twins are providing line of sight to part builds that previously could not be seen.”
The Ultimate Goal
The researchers hope to take the technology one step further, incorporating the defect-spotting ability into the printer’s controls. That way, when the computer vision identifies a known fault condition, the printer can automatically add more power or speed to the laser beam to adjust the thickness of the next layer.In the end-state, the control system would not require the CT scan. “Because this technology is in the early stages of development, we can’t just rely on the digital models we are creating,” says Vinciquerra. “We need to validate and — to a certain extent — actually train the models we’re building, which we can do by cross-checking the computer vision results with a CT scan, which is something we often do with parts after they’re made. So, today, the CT scanner is part of the learning process, but in the future, we hope to obviate most downstream inspection.”
GE sees the next generation of digital twins incorporating information from other sensors monitoring the printing process, such as the shape of the pool of metal rendered molten by the laser.
In addition, this smart, real-time quality control will not function in isolation.
“The true power of digital twins is their ability to share insights with each other,” says Vinciquerra. “So you can imagine thousands of machines sharing unique build insights with each other that makes them each more informed about what to watch for during a build process.”
Subscribe to our FREE magazine, FREE email newsletters or both!
Latest News
About the Author
Tom Kevan is a freelance writer/editor specializing in engineering and communications technology. Contact him via .(JavaScript must be enabled to view this email address).
Follow DERelated Topics


