Editor’s Pick: Creaform MetraSCAN 3D R-Series

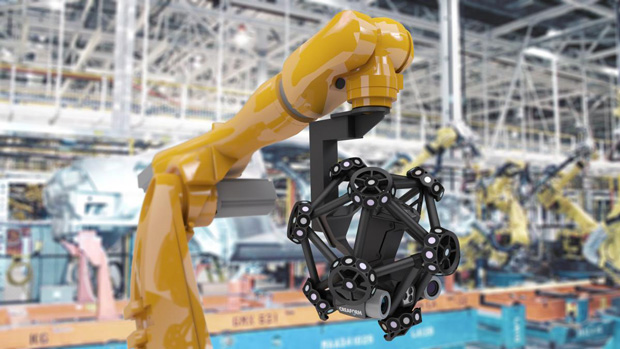
MetraSCAN 3D R-Series have seven built-in laser crosses that can pick up to 480,000 measurements per second on complex surfaces with high reflectivity, according to Creaform. Image courtesy of Creaform Inc.
Latest News
August 24, 2016
Quality control and inspection are key steps in any manufacturing process, which as big a Homer Simpson “d’oh” of an opening sentence you’re gonna read today. The problem is snatching parts off the line to have them checked in a metrology lab can slow things down. And if you don’t detect non-conformances soon enough, you can blow out budgets and schedules with a lot of rework, re-inspecting and wasted resources. Today’s Pick of the Week offers what seems to be an elegant solution.
Creaform, the developer of many interesting 3D measurement technologies, has just announced a new generation of automated solutions for in-line inspection and quality control. Called the MetraSCAN 3D R-Series, these robot-mounted CMM (coordinate measuring machine) 3D scanners let you use optical measurements and industrial automation directly on your production lines.
In other words, the MetraSCAN 3D R-Series scanners enable you bring quality control inspection tools to your shop floor and as close to the part as you possibly can. And that capability should speed up your workflows and make quality control much easier.
It should also make the process more effective. The scanners have seven built-in laser crosses that can pick up to 480,000 measurements per second on complex surfaces with high reflectivity. They can automatically align parts, and they have a technology called TRUaccuracy to ensure you get good measurements in spite of such mayhem as vibrations or heat swings. This technology has a number of neat features. Perhaps the key is dynamic referencing, which keeps parts aligned during the scanning process by using an optical link to lock on to them.
The MetraSCAN 3D R-Series scanners are designed for shop floor environments. For example, they have a small footprint and an optimized robot reach. They have glass-protected positioning targets designed to withstand harsh environmental conditions with all that airborne dust and dirt.
 MetraSCAN 3D R-Series have seven built-in laser crosses that can pick up to 480,000 measurements per second on complex surfaces with high reflectivity, according to Creaform. Image courtesy of Creaform Inc.
The series comprises two models: the MetraSCAN 750-R and MetraSCAN 750-R Elite, with volumetric accuracy being the main difference. They provide accuracy of up to 0.0012 in. (0.030 mm) and resolution of 0.0020 in. (0.050 mm).
You can delve into the specs by downloading the MetraSCAN 3D R-Series brochure that’s linked off of today’s Pick of the Week write-up. You’ll also find a link to a (registration free) video. It’s short but gives you a great idea how you can deploy the MetraSCAN 3D R-Series to your benefit. Good stuff.
Thanks, Pal. – Lockwood
Anthony J. Lockwood
Editor at Large, DE
Subscribe to our FREE magazine, FREE email newsletters or both!
Latest News
About the Author
Anthony J. Lockwood is Digital Engineering’s founding editor. He is now retired. Contact him via [email protected].
Follow DE


